

Well, I love ASL because of all the cool stuff you can re-create. Armored clashes, infantry scuffles, the entire battle of Stalingrad, crossing rivers on boats, gliders and ……….. Paradrops.
Pierce Mason is a man on a mission. He’s got like 500 games all going on at the same time and wants to play everything he has before next year….. or at least it seems like it. He’s making his way through the action packs and other series of scenarios. I offered to play all of the Tactiques scenarios in order and he took me up on it, so we started with number 1.
Dropping off at Maleme? is set in Crete. The German Fallschirmjagers are parachuting in to seize the airfield at Maleme from some dug in Kiwis. I got the Axis side of the action. Now of course, if you’ve played ASL you know that German paras before 1942 were dropped from low altitude, most of their weapons were dropped in canisters separately so these brave fellows had to find their canisters for the support weapons they needed in combat. In ASL this translates to my 548 squads landing as 228 squads until they have scrounged up their personal weapons by moving hex to hex and rolling a die. The support weapons land separately, so someone has to go collect them too.
Paras drop in a line, then they drift…. which can be very bad. Fallschirmjagers drift less because they are dropped closer to the ground. For one of my squads, it didn’t matter……..
I have eight 468 squads on a hill overlooking the airfield to provide support for the paras. Fourteen squads jump from my Ju52’s. Will they jump to victory or disaster?
Let’s find out.
My job is to take the Airfield, this consists of driving the Kiwis out of a perimeter two hexes around the entire airfield. These are 458 squads, a couple of AA guns and Matilda. Foxholes, trenches and wire protect them from assault. I chose my drop points and prepared to exit the safety of my tri-engine planes.
I had planned to spend a couple of turns (there were 8) getting my bearings and collecting my weapons, then starting an assault from two directions. My Landsers from the hill would circle around and attack through the vineyards on the left, and my paras would make the main assault from the right. I was to get some Stuka air support, but another mistake on my part would cost me in a scenario once again.
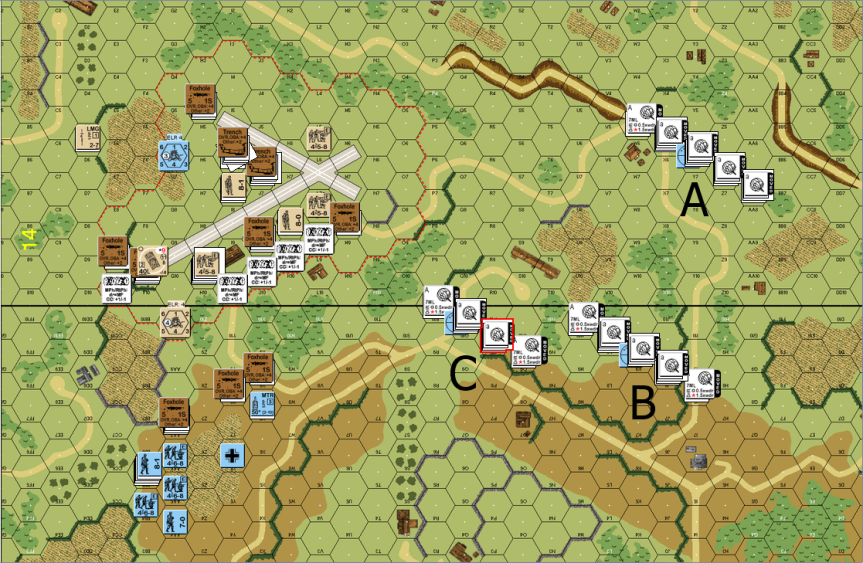
Now came the crucial roll to see if my planes dropped my chutes on the drop points.
B and C dropped right on target. A on the other hand…….

Ruh-Roh Shaggy. This is not good. There was a really good chance group A was going to get slaughtered after they drifted and Pierce’s New Zealanders opened up on them as they were coming down. They got torn up pretty good, and one squad of poor slobs landed right smack dab in the middle of the runway…….
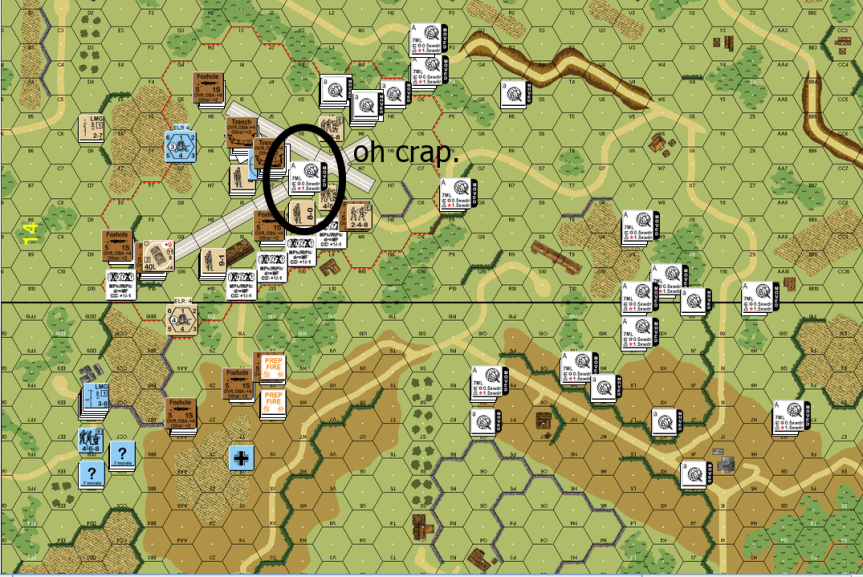
I believe I told Pierce that unit “shat himself”. The drift wasn’t terrible, even for group A it could have been a lot worse but defensive fire while my Gerry’s were still in the air took their toll. My timing was terrible, I kicked off my attack on the left way too early. I wasn’t thinking, this is why I fail at ASL so much. I spent at least two turns trying to round up my gear before I could even begin to form up for an assault.

Unfortunately for me, the stud para commander 9-2 was in group A and broke when Pierce’s troops started shooting. The unit on the airfield was eliminated for failure to rout. (Pierce is a big ol’ meanie). At this point, every 548 on the map is actually a 228 and not fit to mount an assault. The Jagers who dropped on target did pretty well collecting their weapons and arming themselves. Group A would of course have a more difficult time of it. they all had to rout to the only building on the top of the map, rally, then look for weapons. Realistically, for the remainder of the game, I had three buildings functioning as hospitals as my troops went out, got shot and routed back.
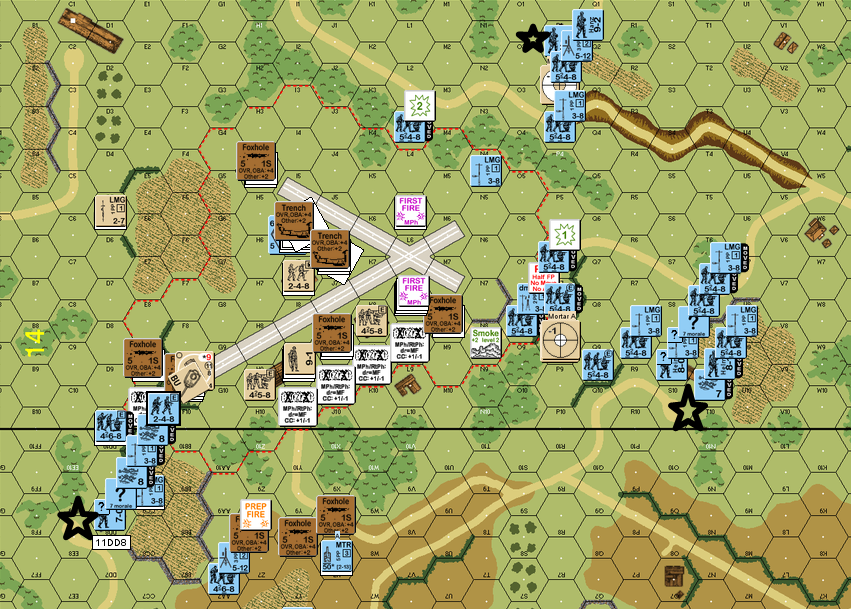
This is turn 5 and I am really just finally getting into position for an assault. This took way too long. The grunts on the left have already tried to attack and have been repulsed. I managed to put both of the AA guns out of action and broke a few New Zealanders, but really didn’t do enough damage to make much of a difference. I kept forgetting to roll for my Stukas, actually forgot I had them. Read and re-read the card dumbass. How many times do I have to tell myself that. So I got them on turn 6 and blew up the Matilda and the squads stacked with it. How might that have changed my attack on the left. Probably by a bunch.

Well, my assault in turn 5 looks good, but we get shot up again. Back to the hospital and we were only able to attack piecemeal, not getting close enough. The Kiwi squads out-ranged me, and they had the terrain.
In the end, I surrendered my troops on turn seven. My guys were all shot up. I had only two moves left and my Stukas had shot their bolts, only 4fp MG were left. Taking out the Matilda was good fun, but maybe if I had remembered my planes on turn three I could have made a better game of it.
It’s a tough go for the Germans but ROAR shows it pretty balanced, even with the small number of playings recorded. As usual I was my own worst enemy. Bad timing and not remembering a VERY important part of my OB hurt me badly.
Well, Pierce is up 1-0 on me, and the left side of my forces are starting to crumble in TAC 2, but that is a story for another day.
Thanks for reading.

Good luck v Pierce. I tangled with him as a beginner and got efficiently smashed. A learning experience, (yet I’m still a beginner.)
LikeLike